Food photography is an art form that requires skill and knowledge to master. In today’s digital age, the demand for high-quality food images has skyrocketed, with over 250 million photos posted monthly on Instagram. For aspiring photographers, capturing mouth-watering food photographs can be challenging – but it doesn’t have to be.
With some basic tips and tricks, you can learn how to create stunning images of your favorite dishes like a pro. From plating and styling to editing final touches, this guide will teach you everything you need to know about taking beautiful pictures of food.

Before you even pick up your camera, it’s important to remember that food photography is all about visuals. A great image should make the viewer want to take a bite and savor the dish's flavor, not actually taste it. Strive for gorgeous aesthetics without sacrificing a realistic look.
One excellent trick is to shoot the food full-bodied. This means capturing the whole dish when it's hot—that's when the food appears in its most appetizing form. When food loses its heat, it often loses its shape and looks dull. You want to create an inviting and charming experience, not something that looks flat or unappealing.
Another way to provide an excellent visual experience is to add colors. Food naturally has a variety of hues, so take advantage of them. Remember that vibrant and contrasting colors often appeal to viewers more than duller shades. You can add extra sides or props to inject color if the main dish is visually neutral.
The right equipment is necessary to take your food photography to the next level. Here are the basics every aspiring food photographer should have:
Camera: A DSLR, a point-and-shoot, or even a high-resolution smartphone camera.
Lenses: A 50mm or 85mm prime lens for DSLRs is great for capturing beautiful bokeh (background blur).
Lighting: Natural light is best, but if you work indoors, invest in a softbox to mimic the sun.
Tripod: Essential for taking sharp, clear images, especially in lower light.
Reflector: A great tool for filling in shadows and adding depth to your images.
Backdrops: Use fabric, wood, or a sheet of white foam board for a clean, professional look.
Props: Silverware, napkins, and tablecloths help tell a story.
Whether you’re a home cook, professional chef, or food blogger, here are seven tips to showcase your food so that everyone will want it.
Always prepare the food in advance. Take the time to season and arrange ingredients to reflect the intended dish properly. Experiment with different plating techniques to create an eye-catching presentation.
The "hero" is the star ingredient—an impressive cut of steak, a freshly made tart, or a colorful salad. Emphasize this main element by giving it the most focus. Use garnishes like herbs or a splash of sauce to make the hero pop.
Lighting creates mood. Experiment with natural light from windows, diffused light from lamps, or artificial flashes. You can also explore the power of shadows by narrowing down light on certain parts of your subject for dramatic emphasis.
Don’t just focus on the food; focus on the environment. Adding props like linen napkins or scattered spices adds texture. Just keep them minimal—too many items can distract the eye from the food.
Depth of field (DOF) is a powerful tool. By using a small f-stop (like f/1.8 or f/2.8), you create a shallow depth of field where only the front of the dish is sharp, and the background falls into a beautiful blur.
Close shots capture textures, like the crispiness of fried chicken. Long shots provide the overall table setting. Mixing both creates a more engaging gallery for your website or social media.
Layering helps create depth. Use an interesting backdrop, then a placemat, then the plate, and finally the food. This builds a "3D" feel that pulls the viewer into the frame.
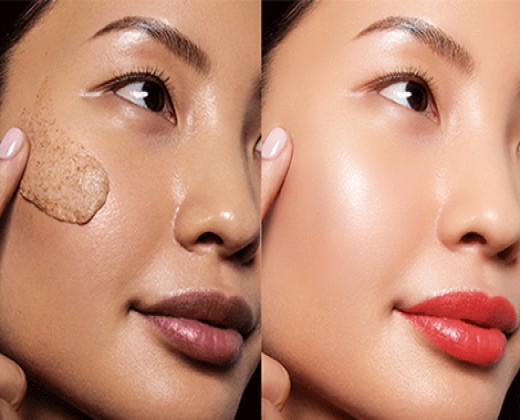
The tips above will help you capture a great shot, but professional editing is the "secret sauce" to perfection. PicScientist.com is an online AI-powered editing suite that simplifies your workflow with deep learning technology.
Here are the essential PicScientist.com tools for your food photography routine:
The Image Upscaler enhances the resolution of your photos without losing quality. This increases sharpness and clarity, making your food look crisp and professional even on large screens.
If you’ve shot an entire menu, the Batch Editor allows you to edit multiple images at once. You can remove backgrounds or apply color corrections to dozens of photos simultaneously, saving you hours of manual work.
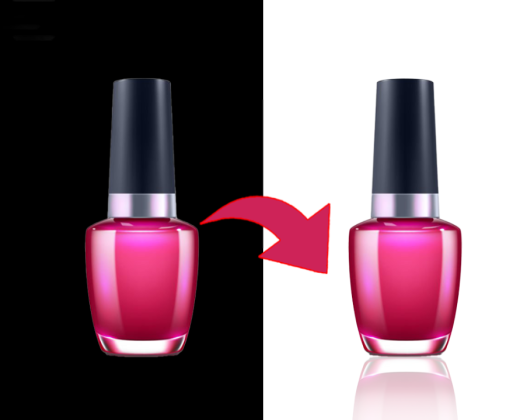
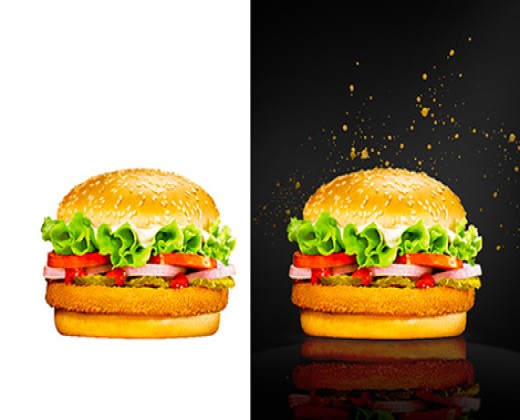
The AI-powered background remover accurately detects the edges of your plate—even with steam or complex garnishes—allowing you to swap a messy kitchen background for a clean, professional studio setting in one click.
Equipment Matters: Use the right lights, lenses, and backdrops.
Lighting is King: Experiment with natural and diffused light.
Focus on the Hero: Use Depth of Field to highlight the star ingredient.
Professional Finish: Use PicScientist.com for upscaling, batch editing, and background removal.
Are you ready to take your food photography to the next level? PicScientist.com’s AI-powered tools are designed to make your editing process faster, so you can focus on being creative.
Try PicScientist.com today and see the difference it makes in your food photography!
Meta Title: Food Photography Guide: Mastering Plating, Lighting, and AI Editing
Meta Description: Learn how to take professional food photos. From plating tips to using PicScientist.com for AI background removal and upscaling.
Social Title: How to Make Your Food Photos Look Delicious 🍕✨
Keywords: Food photography tips, PicScientist, food plating, background remover for food, image upscaler.
Would you like me to suggest some "Foodie" hashtags for when you share this on Social Media?